Build overview #
This is an overview of the steps required for building your scanner. See the links below for the detailed instructions on every topic.
Electronics #
You need to get two PCBs and a couple electronic components first. Then solder things together (pretty basic through-hole soldering only!). Once everything’s set up, you need to do a little calibration and assemble a few cables.
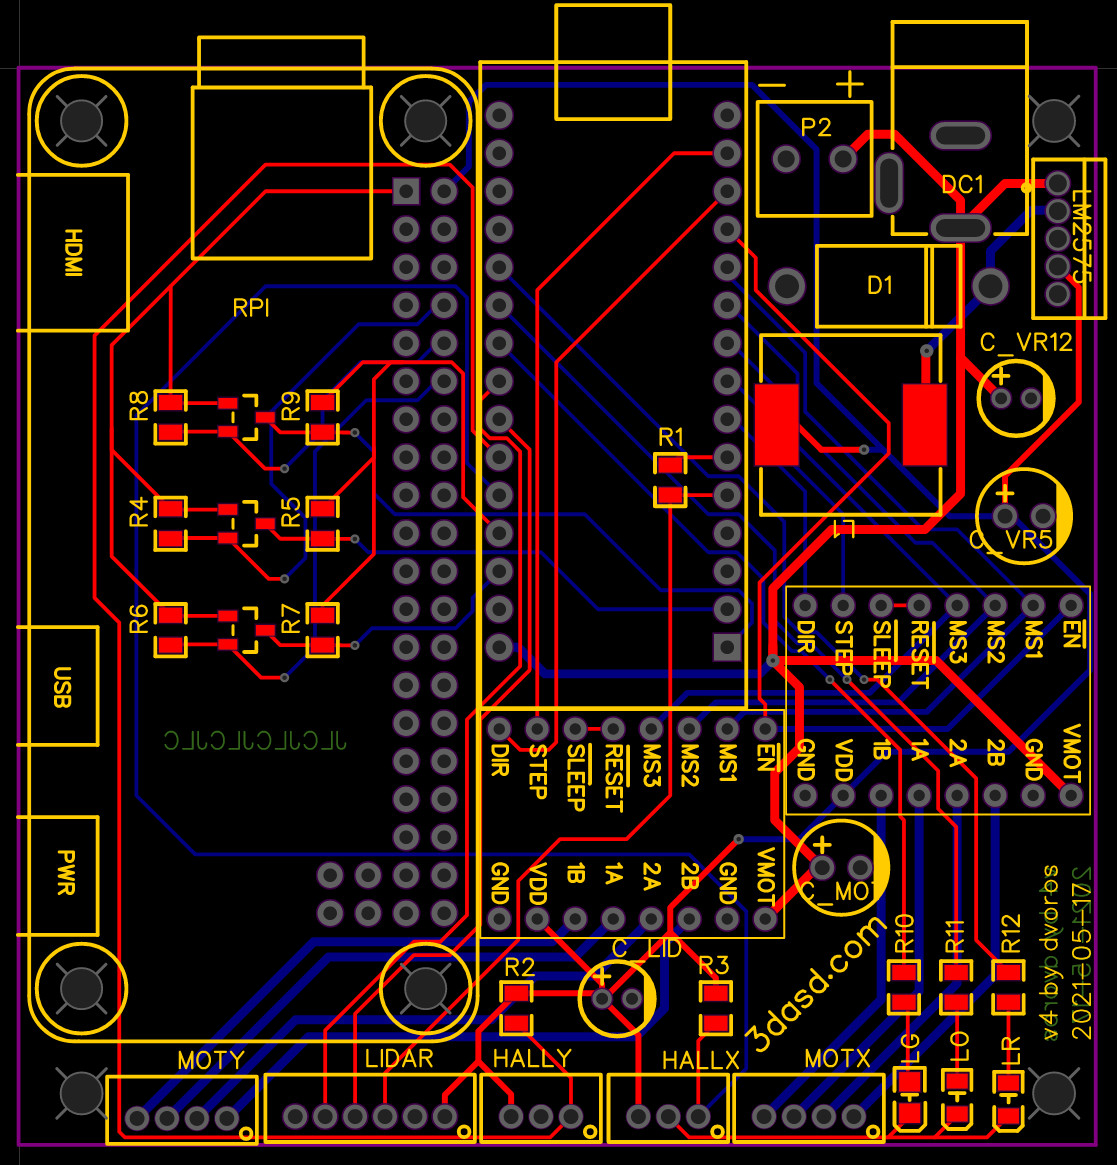
See Electronics for all the details.
Mechanics #
Almost all of the mechanical parts are 3D-printed. It takes around 20 hours to print everything. You also need to get a couple nuts and bolts and also a few ball bearings and magnets.
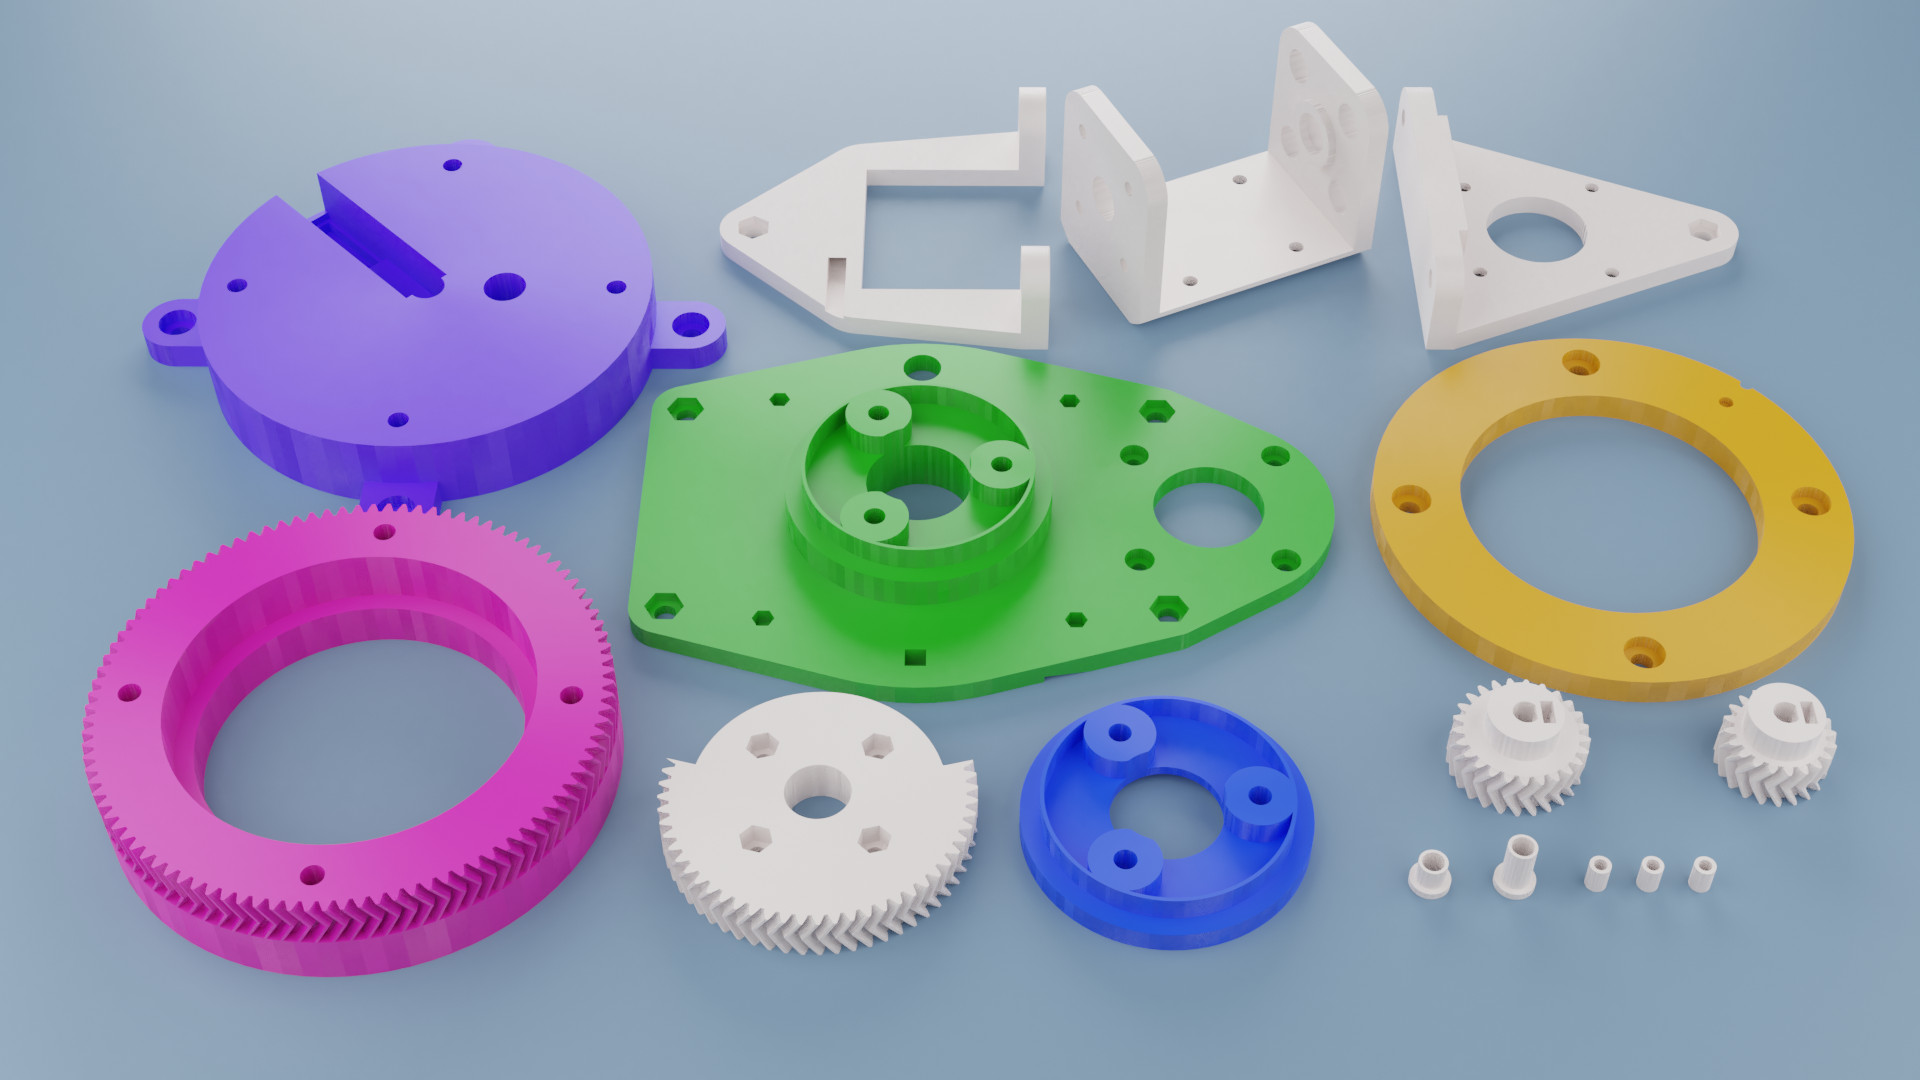
See Mechanics for all the details.
Assembly #
Once you have all the parts ready it’s time to assemble the scanner. It’s a bit complicated but there’s a video tutorial that covers everything.
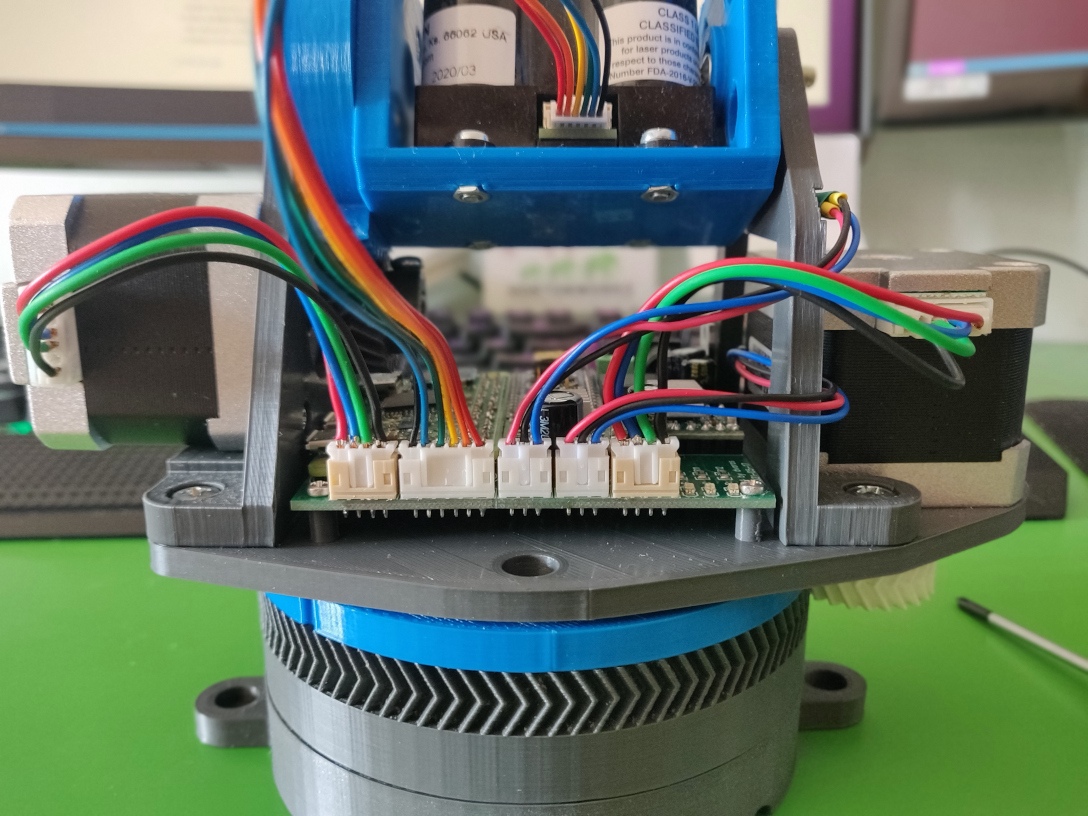
See Assembly for all the details.
Software #
With everything wired up you will need to install the software components on the scanner. Initialize an SD card for the on-board Raspberry Pi with a base image, fill in your custom information (e.g. WiFi network) and then connect via SSH to flash the on-board Arduino with the driver program.
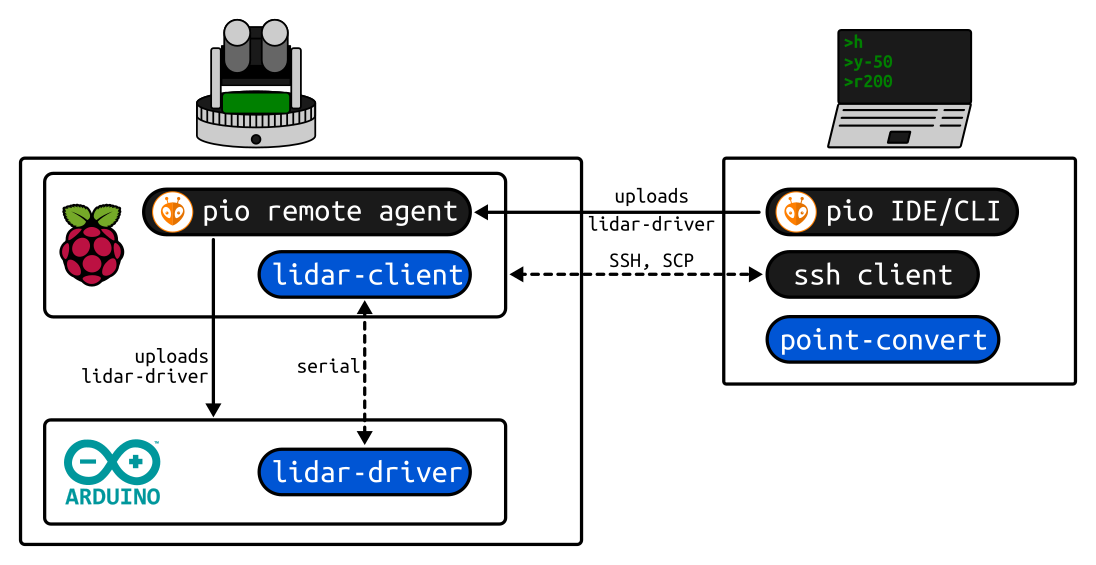
See Software for all the details.